Using Trail Cameras
Trail cameras, also known as scout cameras and game cameras, can multiply your wildlife watching enjoyment by showing you what animals are up to when you are not around. They are primarily used by hunters, but wildlife watchers and wildlife researchers find them valuable too.
The idea behind trail cameras is simple--install one in an area where you anticipate animal activity. When a passing animal trips the motion detector, the camera will snap a picture.
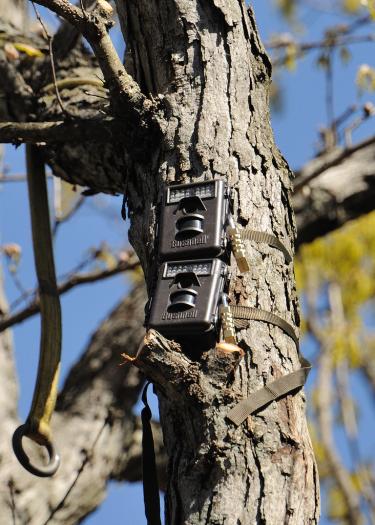
Prices start at about $50 for a basic camera. Pricier cameras generally offer better picture quality or advanced features such as video, infrared flash for night shots, or remote access. Cameras are mounted with screws and straps. Consider using more than one camera to get different views of the same scene, or to cover more sites.
TRAIL CAMERA LOCATION CHECKLIST
For best results, place your trail camera:
- Where you have seen signs of animals: Near animal tracks, scat, or other signs like scrapes and rubs; on a game trail or travel corridor; on a woodland edge; or along a stream.
- On a stable location: such as a tree trunk at least 10 inches thick (so the trunk won’t sway in the wind, triggering the motion sensor), a fencepost or a speciallly installed support.
- Near food or water: Aimed at food or water source. (You are more likely to get a photo where animals linger, but don’t include the water in the frame, because moving water will trigger the motion sensor.) OR…
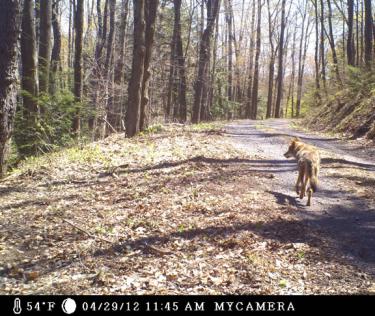
- On a trail or path: Aimed at a 45-degree angle to a game trail or travel corridor, not at the nearest part of the trail. (Cameras take a second to take the picture, but in that second the animal has moved down the trail. Include as much of the trail in the shot as possible.)
- In a shady spot: The camera is triggered by both heat and motion, and the bigger the difference between the temperature of the
animal and your camera, the more likely you are to get the shot.Trail cam photo taken on a State College, PA Tree Farm.
- Not aimed at the rising or setting sun: This will trigger the heat-sensing mechanism.
- At animal height: Mounted at the height of the species you are most interested in. (That’s three feet off the ground for deer.) Or, mount the camera high and aim it low for more flexibility, if you don’t mind getting pictures of animals’ backs.
Then:
- Say “cheese.” Check your setup by taking a test photo before you leave.
Find out More
- Read more about the uses of trail cameras in this article by Angie Berchielli, a naturalist, wildlife photographer, trapper and licensed guide.
- In this article from Northern Woodlands magazine, Gustav W. Verderber writes about how he and his friend "camera-trapped" a bobcat.
How can I get more tips?
It’s simple! Enter your email below.